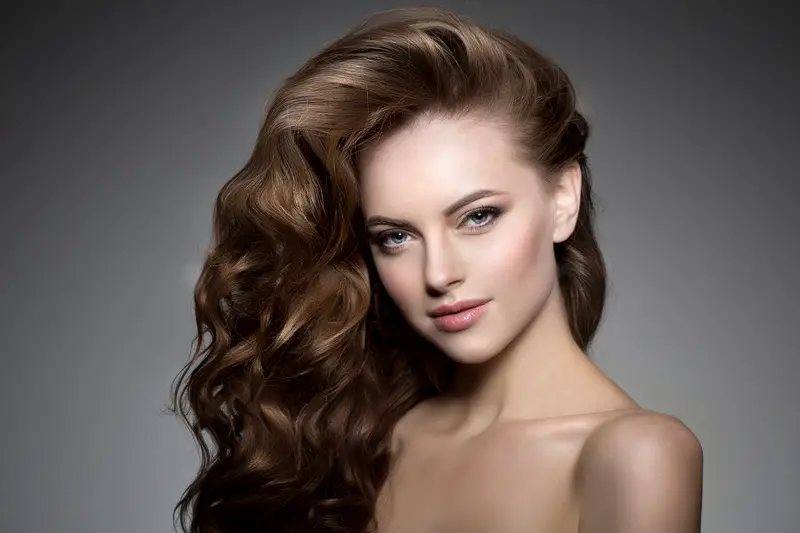
Congratulations! So you have yourself a wonderful Drybar curling iron! You must be super excited to try it! So allow me to tell you how to use it step by step to get the best result, head-turning attention, and compliments with your curls from the very first time.

Let’s put the basic information out of the way first.
So the 3-day bender curling iron comes in 1 inch and 1.25-inch size; however, except for the diameter of the barrels all the features are the same thus the directions for using both the curling irons are same as well. Although the features are the same, yet due the bigger barrel 1.25 inch will give you bigger curls than the 1 inch 3-day bender. Drybar 3 day bender is suitable for all hair types but you will need to adjust it according to your hair type.
Table of Contents
How to adjust the temperature
No need to preheat the 3-day bender curling iron, just plug it in and turn the switch on and it will heat up instantly, in 10 seconds. It heats up fast and by default, the temperature is set to 350°F/177°C. If you are confused how to adjust the temperature follow the instruction given below:
There is an LCD panel/digital monitor on the handle of the Drybar 3 day bender, where the temperature is shown, and there are 3 buttons,
- First button, closest to the handle is the power button for turning it on and off
- The (+) sign button is for increasing the temperature
- The (-) sign button is to decrease the temperature
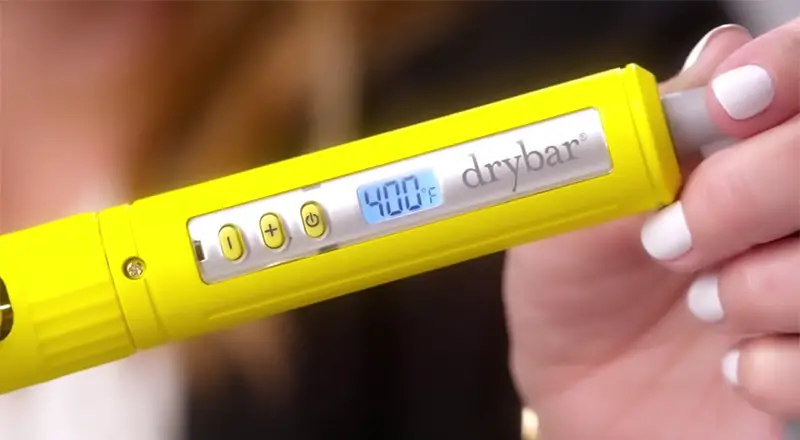
When you plug in the curling iron; the digital monitor will show ‘OFF’ on it. Turn it on by pressing the power button once. Press it again and it will turn off.
Find the suitable temperature for your hair from the chart below and adjust it using the (+) or (-) button
The Temperature Guide According To The Hair Type
| The Temperature Table According to The Hair Type | ||
|---|---|---|
| 320°F to 370°F | 160°C to 188°C | Damaged, colored or chemically treated hair |
| 370°F to 400°F | 188°C to 204°C | Straight, very fine to normal fine hair |
| 400°F to 420°F | 204°C to 215°C | Straight to wavy, medium hair |
| 420°F to 440°F | 215°C to 225°C | Very thick, coarse, wavy or curly hair |
The steps to use the Drybar curling irons
- Wash your hair with shampoo to remove dirt and oily substance and gently brush your towel-dried hair
- Use conditioner only if you have extremely thick, dry and frizzy hair. Use stronghold setting mousse for silky pin-straight hair. No need to use anything if you have normal hair but can use thermal protectant if you want to
- Part your hair into equal sections depending on the thickness of your hair
- Section your hair thinly for kinkier spirals or widely if you want bigger waves. For normal curls, it’s best to make approximately 1-inch sections
- Select heat setting according to your hair type. This is very important for perfectly done long-lasting curls! If the heat is too low your curls will be undercooked and won’t last long. If the temperature is too high your curls will look too stiff and unnaturally curled
- Start at the root and bring your hand downwards while rotating barrel like a dial and wrap the hair around the barrel. It’s best to curl away from your face to the opposite direction but you can do whichever way you like depending on the style you want to achieve
- Hold firmly without pulling too hard or the barrel will rotate, hold for 4 to 5 seconds to set the curls perfectly
- Gently let the hair drop and pull the curled section down a little for a more tousled and natural look
- Use setting spray if your hair is naturally silky and straight to make the hairstyle last longer
Safety features and other attributes
Drybar 3 day bender curling iron automatically shuts down after 30 minutes and prevents life-threatening accidents from happening
Has a cool tip on the top so you won’t burn your hand when you are curling your hair and it has a swivel cord so it will not tangle while it’s rotating to wrap the hair on itself
Don’t put the hot curling on any surface that may melt or burn. Use the black little counter stand for keeping the hot iron provided in the box
Has a long swivel sturdy wear and tear-proof cord
Store in a cool dry and clean place to avoid damage to the curling
Gratitude
Hope the step by step instruction helped you to curl your hair using the 3-day bender. Thank you for trusting Drybar curling iron and we are sure, you will get wonderful compliments after curling your hair with Drybar 3 day bender curling iron.
FAQs
1. How do you turn on a dry bar curling iron?
First, you plug in the curling iron and turn it on by pressing the power button.
There are three temperature buttons on the handle and the temperature is displayed on the LCD monitor. Press the (+) sign button to increase the temperature. The plug-in sets the curling iron to heat up within 10 seconds and the default temperature can be set at 350°F.
2. How do you use Drybar curling iron on long hair?
After washing and conditioning your hair, towel dry it. Make partitions of the hair in equal sections. For kinky curls, section the hair thinly and thicker for bigger waves. Normal curls need approximately 1-inch sections. Select the heat setting depending on your hair type. Low temperature will cause curls to fall out faster while the too high temperature will make the curls unnaturally stiff. Begin at the roots and move the hand downwards while rotating the barrel like a dial, wrapping the hair around it. Curl away from the face for best results. Hold for 4 to 5 seconds allowing the curls to set perfectly. Gently roll out the iron and allow the hair to drop. Run your fingers through the curled section for a tousled look. Use a setting spray to finish.
3. What temperature should a curling iron be for fine hair?
So heat does matter. If you have fine hair it is best to keep the temperature below 200°F.
4. How do you use a Drybar 3-Day bender?
Using a Drybar 3-Day bender is super easy. You need to just make a small section of the hair. With most curling iron you start with the end of the hair but with a ceramic Drybar 3 day bender you start close to the root and clamp at the top of the barrel and rotate it to create perfect curls.
5. How do you wrap party with Drybar?
It is very simple, all you need is to make 2-inch sections of your hair, Further, wrap each section of the hair pointing the barrel tip downwards rotating for a wavy beachy curl. For loose waves just hold for few seconds.